


(Source)
Overview:
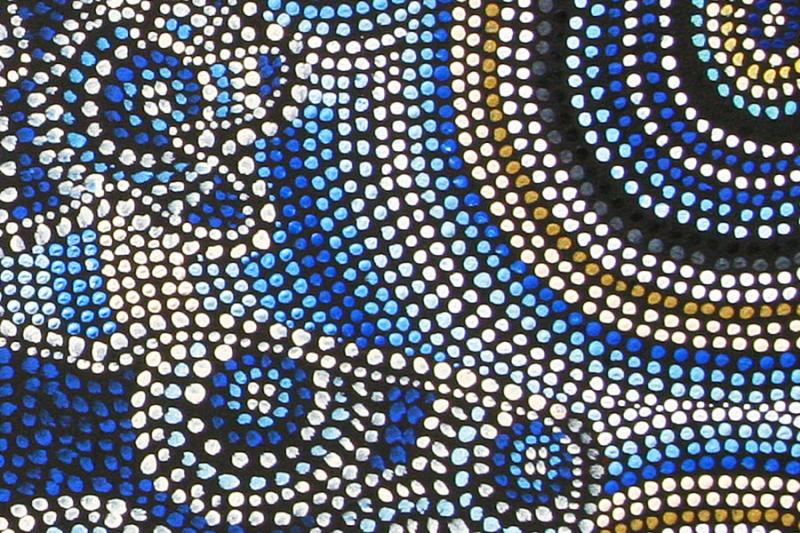
There are so many unique techniques you can explore with acrylic paint—from acrylic blending and dry brush techniques to acrylic paint pouring and so much more! In this guide, we will be focusing on acrylic dot painting techniques and the different surfaces you can use to create your dotty masterpieces. Dot painting has been a commonly used technique in Aboriginal art ever since 1971, and was even used to disguise the sacred meanings behind the stories in their paintings. Since then, dot painting has adapted to include more contemporary techniques, such as 3D effects, using acrylic mediums, diverse colours and more! Read on to get inspired for your next dot painting.
Before you start
Before you get stuck into these acrylic dot painting techniques, you will need some essential supplies. Most of these dot painting tools you will have at home but if you don’t, you can always grab some online or in-store from Art to Art.
- Dotting tools, q-tips, pencil erasers, markers, fine acrylic paint brushes, and/or toothpicks
- Paint palette
- Suitable surface/canvas (more on this below)
- Acrylic varnish
Acrylic dot painting surfaces
Dot painting can be completed on a wide range of surfaces. Some of the most popular dot painting surfaces include:
When you’re working with unique surfaces, just make sure to cover your artwork with a coat of varnish afterwards to avoid any fading or yellowing.
7 acrylic dot painting for beginners
1. Dip and dot
(Source)
This is the most commonly used dot painting technique. The dip and dot technique is also super easy and can be completed by artists of all levels! Just make sure not to overload your dotting tool with the paint as your dots can become uneven.
How to do it:
- Before you start, you want to choose the colours for your artwork.
- Grab your dotting tool, pencil eraser, or paint brush end, and dip it into your chosen colour.
- Once you have a medium amount of paint on your dotting tool, dot it onto your surface.
- Continue re-dipping it into the paint and dotting it to create your desired pattern.
2. Dot-walking
 (Source)
The dot-walking technique is super simple and is a great way to add some extra detail to your dot paintings! You can let your imagination run wild and create a range of fun designs with this acrylic dot painting technique. This method is also best achieved using a dotting tool, so make sure you have one on hand.
How to do it:
- Start by using a pencil eraser, a paint brush, or a dotting tool in your preferred colour of paint and create a large dot in the centre of your surface.
- Load up your dot painting tool with some paint (in any colour) and continue dotting away from the centre dot, without dipping your tool back in the paint.
- As you work your way to the outside of the surface your dots will get smaller and smaller, creating the dot-walking effect.
- Continue until you have covered the outside of the centre circle.
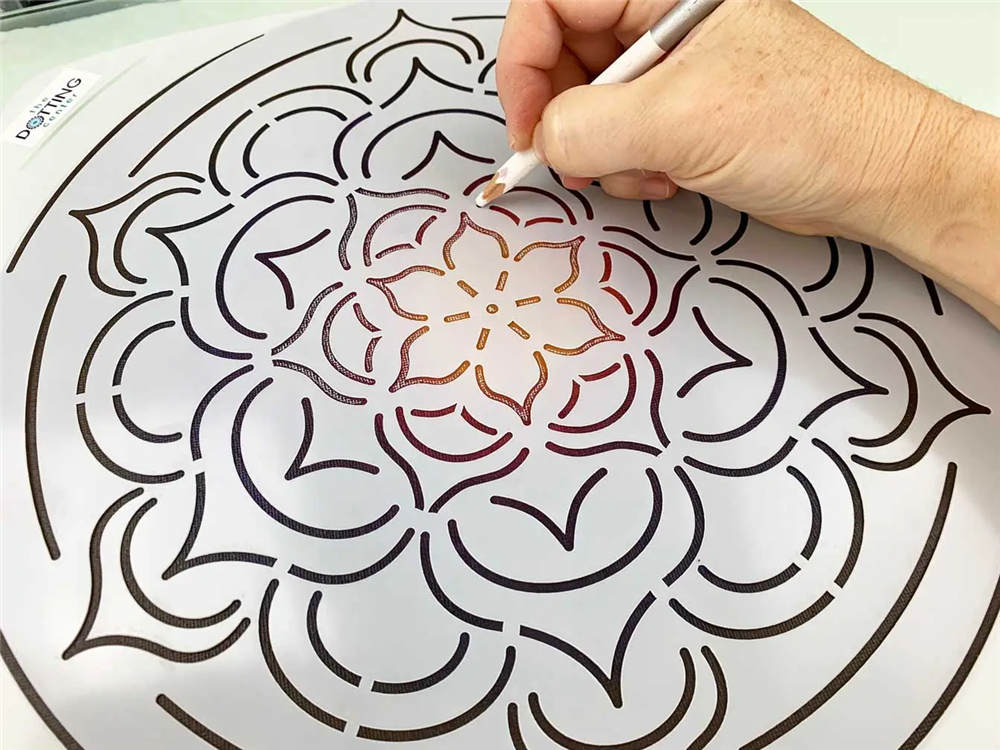
3. Dot painting with a stencil
 (Source)
Stencils are an easy way to elevate your design, especially if you are a beginner to dot painting. This means you won’t need to guess where to put your dots and your designs can be perfectly aligned! Stencils can also be applied to a range of surfaces including canvas, rocks, ceramics, and more.
How to do it:
- Choose a stencil design.
- Once you have your stencil, lay it on your chosen surface and use an art pencil to draw the outline in your stencil. We recommend using a white pencil as it can be easily disguised with paint.
- Choose the colours you want to work with and use your dotting tool to fill in the design.
- Once completed, let your design dry completely.
- If you have any leftover marks from the pencil, simply grab a cotton bud, spray it with water, and carefully rub the marks away.
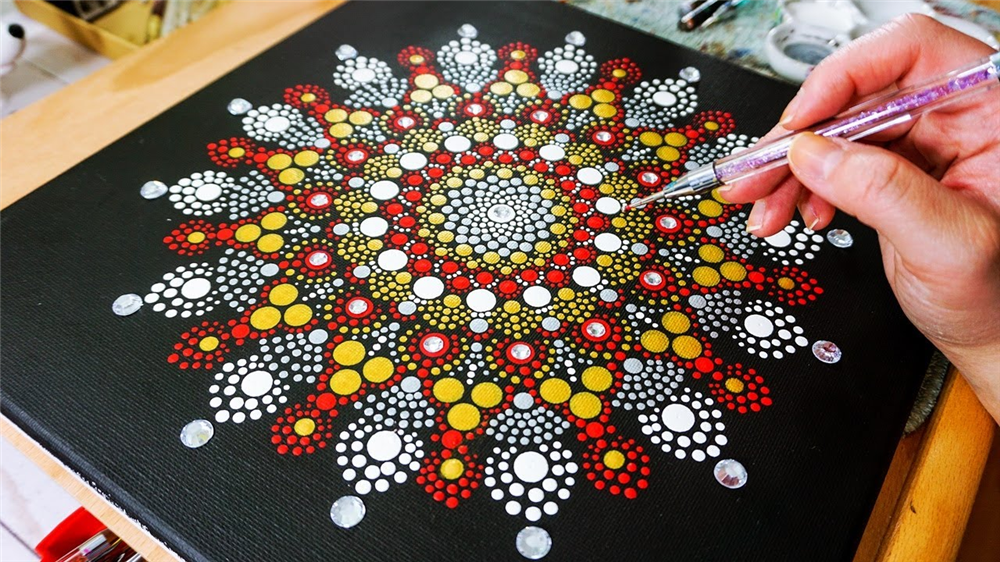
4. Mandala dotting technique

(Source)
The Mandala dotting technique is one of the most popular designs used in dot painting art. Although these designs may seem intricate and difficult, with a few handy tips you can create designs like this in no time! You can get as creative as you like, testing out a range of different mandala designs.
How to do it:
- Start by dipping your dot painting tool into your paint and place a large dot in the centre.
- Using a small dotting tool, dip it into another colour and create evenly spaced smaller dots around the centre circle.
- Using a different colour on your tool, create larger dots in between the spaces where your smaller dots are placed.
- Continue making the dots larger as you progress and make sure to add them in the spaces between the previous dots.
- Once you are happy with the amount of larger dots, you can begin adding smaller dots around some of your circles, like the dot walking technique.
- You can also add some extra pzazz with some swooshes and comma-like dots. You can create these by placing down a dot of paint and dragging it.
5. Painting a shape with dotting tools
 (Source)
Dot painting doesn’t have to be limited to only dots, you can create a range of unique shapes as well! There are various shapes you can create, including hearts, stars, moons, butterflies, and more.
How to do it:
- Start by tracing the outline of your shape using an art pencil, a marker, or some paint on a fine paintbrush.
- Grab your dipping tool and dip it into your preferred colour of paint. And, apply your dots around the outline of your shape. Be careful not to go inside the lines of the shape.
- Using a smaller dotting tool, you can blend the inside dots together to avoid having any spaces from showing.
- If you make a mistake, simply clean it up with a damp cotton tip.
- To complete your design add different-sized dots around your shape. You can get as creative as you wish during this stage!
6. Stacked dot technique
 (Source)
If you’re looking to create a super unique and eye-catching dot painting, you can't go past this stacked dot technique! This is also great for use in mandala designs and will instantly take your artworks from a beginner level to professional.
How to do it:
- Start by choosing the colours you want to work with. You can stick to a small colour palette or use a wide range of colours, depending on your style.
- Paint your surface with a base coat.
- Using white paint, dip your tool into the paint and begin by creating various large and medium-sized dots all over your surface.
- Try to make sure your dots don’t touch and if you make a mistake, wait for it to dry and add a dot in the colour of your base coat over the top.
- Let your white dots dry completely.
- Once dried, add your second colour inside your white dots and let this dry again.
- If you want to add more colours inside your dots, just wait for the paint to dry before adding more.
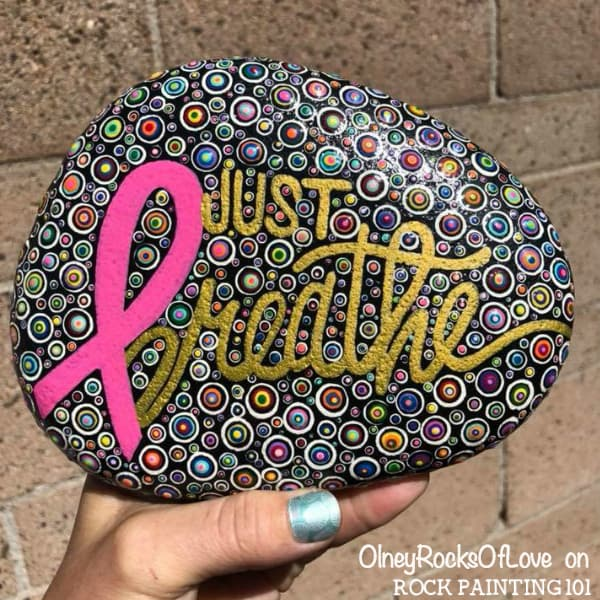
7. Dot painting with paint pens

(Source)
If you’re not comfortable using a dotting tool or you would prefer to try out a different dotting technique, paint pens are an easy and effective alternative. The paint pen dotting technique is popularly used on surfaces like rocks, ceramics, and glasses as they’re quick drying.
How to do it:
- Purchase acrylic paint pens in your chosen colours.
- Draw on your base coat using the paint pens.
- Once your base coat is dry, start drawing your design onto your surface. You can get creative and add different-sized dots onto your artwork.
- If you’re working on rock or glass, keep in mind that you may need to use a few coats of the paint pen to make your colours stand out.
- Remember to coat your final design with acrylic varnish and you’re done!
So there you have it, 7 acrylic dot painting techniques, plus some different surfaces to experiment with. Don’t forget to get all your art supplies from Art to Art either online or in-store. When you shop online, you can enjoy free shipping for orders over $100 and same-day delivery Australia-wide before 11am.
More inspo & helpful resources
- Acrylic Painting Ideas
- Acrylic Painting Techniques
- Abstract acrylic painting ideas