Epoxy resin is an easy medium to learn. It's a fun way to tap into your artistic side, and you’ll be amazed at the beautiful artwork you can create, even as a beginner. The best part is that you’ll never run out of new ideas, new techniques and new projects to try.
Working with epoxy resin is simple and once you understand the basics, you’ll find the possibilities are endless! From 3-dimensional paintings and home decor to sparkling jewelry and one-of-a-kind furniture, epoxy resin has an unparalleled versatility and a beauty that is irresistible.
Our beginner’s guide to resin art includes everything you’ll need to successfully start with epoxy resin. Once you reach the bottom of the page, you’ll be able to confidently answer the following questions about epoxy resin art:
What is epoxy resin made of?
What is resin art?
Is epoxy resin safe to use?
What kind of resin should I get?
What epoxy resin supplies do beginners need?
What colours and dyes are suitable for resin art?
How can I create epoxy resin art as a beginner? (including how to calculate the resin amount, resin pouring & resin processing time.)
How can I avoid epoxy resin bubbles?
How easy is DIY resin art?
Ready to impress your friends - and potentially your customers - with some unique epoxy resin masterpieces? Read on to get inspired!
What Is Epoxy Resin Made Of?
Epoxy resin is a clear liquid plastic made of two parts: resin and hardener. First, let’s dig into the term “resin”. There are two types of resin: natural resin and synthetic resin.
What is synthetic resin?
Synthetic resin- i.e. liquid plastic - is an artificial, more affordable version of natural resin, and comes in the form of viscous liquids that harden into a plastic surface. The most widely used synthetic resin is epoxy resin, usually made of polyester, silicone or polyurethane. Epoxy resin is popular because it is economical, versatile, and effectively imitates both the liquid and solid properties of natural resins.
Synthetic resin cannot transform into a solid without a hardener. Hardeners serve as the catalyst that cures resin. They are the epoxy curing agents, and are typically made of chemical compounds such as polyamides and amines.
When synthetic resin is mixed with a suitable hardener, a chemical reaction (aka curing) occurs. Curing transforms the two liquid materials into a hard, durable, shiny solid within a few hours at room temperature. The result is a crystal clear, high-gloss surface. When you use epoxy resin to create artwork, this is referred to as Resin Art.
What Is Epoxy Resin Art?
When artists and crafters refer to the resin they use to create "resin art", they’re almost always talking about epoxy resin.
Initially, epoxy resin was used in industrial applications. That is, until artists discovered that a shiny coat of resin provided a sleek, modern finish and made the color in paintings and photographs pop.
In recent years, resin art has soared in popularity and has become a true obsession for contemporary artists and designers, as well as for crafters and DIY hobbyists.
Epoxy resin can be used in a variety of ways to create artwork with exceptional depth and beauty. Here are some of the most popular resin art creations:
Coasters & Trays
Jewelry Resin
Flow Art Projects
Abstract Art
Resin Castings
Resin Wood Lamps
Epoxy Countertops
Sculptures
Resin Geode Art
Mosaics
Charcuterie Platters / Serving Boards
Flowers Preserved in Resin
Epoxy Art Paintings
Wood River Tables
Resin Pens
Resin Bar Tops
Resin Tumblers
You can also use epoxy resin as a top coatfor drawings, paintings and photos, giving them a shiny finish while also protecting them from damage and the effects of UV light.
The addition of resin colourants and inclusions creates mesmerizing effects. Whether you’re a beginner or an experienced artist, experimentation is key when working with epoxy resin.
Is Epoxy Resin Safe To Use?
Not all epoxy resin brands are created equally. Many brands on the market contain dangerous solvents and fillers in their formulas in order to stretch the product. They come with scary warnings on the label and pose some serious health risks to the user.
Thankfully, there is a brand on the market which is non-toxic and has been properly tested to ensure your health and safety won't be compromised.ArtResin Epoxy Resin was designed specifically for artists and crafters. It's a pure, low-odor formula that is safe for use at home when used as directed. It contains no harmful solvents and releases no VOCs or fumes that can irritate your lungs. Unfortunately, this is not the case for most epoxy resin brands so before you start, always consult the Safety Data Sheet for the brand of resin you are using to ensure the product you're using is safe, or that you are protecting yourself with the correct personal protective equipment, such as safety goggles and respiratory protection.
All epoxy resins, regardless of brand, can cause skin irritation in some users, so make sure you follow these common-sense, safety precautions:
Wear disposable, nitrile gloves.
Wear long-sleeved clothing.
Work in a well-ventilated space with open windows and doors.
Do not drink or eat while working with resin.
Keep out of reach of children and pets.
Remove all traces of resin from tools, work surfaces and clothes with paper towel and isopropyl alcohol.
Do not dispose of unused resin down the sink.
What Kind Of Resin Should I Get?
When you’re first starting out with resin art, you may be tempted to buy the cheapest epoxy resin you can find. The truth is, this is exactly the type of resin to stay away from!
Cheap epoxy resins are not designed for art. Typically, they are made with toxic ingredients, emit noxious fumes, and will turn yellow, ruining your artwork and wasting your money. This is exactly where the saying "You get what you pay for" rings true.
In the end, it's worth paying a little extra for a product like ArtResin or Glass Coat high-quality, crystal clear, non-toxic and 100% safe epoxy resin to protect both your health and your artwork.
What Epoxy Resin Supplies Do Beginners Need?
No matter what you make, there are a few key tools you need when working with epoxy resin. As your confidence grows and you experiment with more projects, you can start adding in colorants, silicone molds, 3D inclusions and more!
Here are the basic resin supplies and accessories to buy:
Resin & hardener
Plastic measuring cups
Plastic mixing container
Disposable gloves, stir stick & spreader
Plastic drop sheet - to protect your work surface
Level - to ensure your work is perfectly horizontal
Torch- to get rid of bubbles
Toothpicks - to fish out bits of dust
Dust cover -to protect your work while it cures
Paper towel & isopropyl alcohol - to clean sticky tools
Optional tools, depending on the project:
Plastic stands - to prop artwork off of the work surface
Masking tape - taping off the back of your piece will catch drips
Colourants - use colorants made for resin
Embellishments - enhance your resin with glitter, inks, pigments, stones, beads, shells, gold flakes, and more.
Small mixing cups & craft sticks - for mixing small amounts of tinted resin
Heat gun or hair dryer - togently push your resin around for flow art
Silicone molds-for makingcoasters and jewelry
Alcohol Ink - a must for making petri dish art
What Colours And Dyes Are Suitable For Resin Art?
Resin artists use many different types of colourants to tint epoxy resin. Each one has its own unique qualities and effects that will determine the final result. Some of the most popular resin colorants include:
Resin colourants are available in so many options including solid colors, metallics, neons/fluorescents, and pearlescent effects. The choice is yours!
To colour epoxy resin, first, mix the resin and hardener, and then add the epoxy colourant of your choice. Stir slowly and thoroughly, until the resin and colourant are perfectly blended together.
How To Make Epoxy Resin Art For The First Time
1: Prepare Your Work Area
When working with resin, it’s important that your workspace is clean, free of dust, and well-ventilated. The surface you’re working on should be protected with a plastic drop sheet and perfectly level so that the resin cures evenly. Protect the floor from resin drips with a drop sheet.
Ensure that all the tools you’ll need are on hand and that your piece is prepped and ready to go, before you measure and mix.
Consult the resin’s Safety Data Sheet to ensure you have the required Personal Protective Equipment for the resin you are using. ArtResin requires the use of disposable gloves, but some resin brands may require safety goggles and even respiratory protection. Stay safe and always check the SDS before you start!
2: Measure how much epoxy resin you need
Consult the instruction manual to determine the correct mixing ratio. Different brands of resin may have different mixing ratios so this is an important step. ArtResin epoxy resin, for example, has a 1:1 mixing ratio, measured by volume. This means you need equal amounts of resin (Part A) and hardener (Part B) mixed into a cup.
Wear disposable nitrile gloves to protect your skin before you measureand mix, and anytime you're handling wet resin tools or the resin bottles.
Measure accurately: Be aware that adding too much of either the resin or hardener will alter the chemical reaction and the mixture will not cure properly.
❌ What NOT to do: People often think they can speed up the 24-hour cure time by adding more hardener to the mixture. However, this throws off the delicate 1:1 mixing ratio, and your resin will not cure properly.
✅ What To Do: The best way to encourage a quicker cure is to increase the room temperature, since curing is accelerated by heat.
3: Mix
While imagination and creativity are important, patience is a trait that will truly benefit epoxy resin artists and DIY creators. Mix the resin and hardener slowly until they are well blended. It's important to stir slowly to avoid introducing excess bubbles into the resin mixture.
Mixing time can vary from brand to brand, so check the instruction manual before you start. ArtResin epoxy, for example, needs to be mixed for at least 3 minutes.
Scrape the sides and bottom of the mixing vessel as you stir. Improperly mixed resin left on the sides and bottom will not catalyze properly, leaving sticky spots that will not harden.
You will likely see some bubbles in the resin mixture, even if you've mixed slowly. Not to worry - these bubbles will be taken care of after the resin is poured.
4: Resin Pouring For Beginners
Next, pour the resin mixture over your artwork. Ensure your piece is dry and dust-free before you pour. If you’re working with ArtResin, you’ll have about 40 minutes of working time before the resin becomes too thick to pour and spread.
Guide the resin into place using a flat object like a plastic spreader. ArtResin is self-levelling and will start to spread on its own, but spreading it will ensure the entire surface is coated evenly.
You can deal with the edges of your piece in a few different ways.
Protect the sides with tape, guiding the resin to edges so that the ArtResin sits domed on top of their piece. Remove the tape at the 24 hour mark to reveal the clean sides.
Tape off the underside of the piece and allow the resin to drip over the sides, spreading it smooth with a foam brush or a gloved finger.
5: Finish Your Epoxy Resin Work
A quick pass with a flame torch will remove air bubbles with ease. Many of these tiny air bubbles will pop on their own but an Blow Torch will provide a flawless, glass-like surface.
Use a toothpick to pick out any bits of dust or hair that may have settled into the wet resin. Looking at the spread out resin under a light source helps you see any imperfections. Your smartphone’s flashlight is a perfect tool for this!
Place a protective covering over your art piece, such as a cardboard box or plastic tote. Ensure the cover is clean and within easy reach before you start to resin. This way, you won't have to leave your wet piece while you search for one.
6: Wait For The Resin Artwork To Cure
Allow the resin art to sit for at least 24 hours in a dust-free space while it cures.
In approximately 3-5 hours, the resin will be thick and tacky and, at this point, you'll be able to pour a second layer if you wish. Within 24 hours, the resin will be dry to the touch and 95% cured. After 24 hours, you may display your piece or hang it on the wall without worry. It will be fully cured within 72 hours, at which point you may safely ship it.
5 Tips To Avoid Bubbles In Epoxy Resin
Bubbles can be one of the biggest challenges when working with epoxy resin.
There are 4 main reasons why you may experience bubbles in your resin:
Not following best epoxy resin practices
Cold temperatures
Pouring too thick
The artwork may be releasing trapped air (this is often the case with paper and organic materials like wood, leaves, dried flowers etc.)
Follow these guidelines to help prevent air bubbles when using resin:
Use a Torch- A torch is the most efficient way to remove bubbles. The flame heats the resin surface up instantly, thinning the resin out and allowing bubbles to escape.
Work in a Warm Environment- Epoxy resin loves warmth so make sure your workspace is slightly warmer than room temperature 24-30C for a resin that with a crystal clear appearance and honey-like consistency, that pours and spreads with ease. You’ll know the temperature is too cold when the resin is thick, cloudy, and has a milky appearance from thousands of micro bubbles that you’ll never be able to torch out.
Pour in 3mm layers - If the resin is poured thicker than 3mm bubbles won't be able to escape to surface, and they'll end up curing in your resin. For a thicker coat of epoxy resin, pour in layers, waiting 3-5 hours between each one.
Seal over natural objects - To prevent natural objects from breathing and releasing air bubbles into the resin, seal these items with a brush on or a spray sealant and allow to dry before applying epoxy resin.
How Easy Is DIY Resin Art?
Epoxy resin art might seem intimidating at first, but once you try it, you'll soon see why it's such a fun, creative hobby for artists, crafters and DIY enthusiasts. In fact, after you get the hang of it, you'll feel inspired to attempt larger projects and try out some new techniques!
With a bit of practice, you'll soon be measuring, mixing and pouring resin like a pro!
Top 10 Easy Resin Art Project Ideas For Beginners
Feeling inspired to try making resin art for yourself? From coating artwork to pouring coasters, flow art, trinket dishes and more, there are so many ways to get creative with epoxy resin!
Heres a list of our top 10 creative resin art ideas, perfect for beginners and experienced resin artists alike. Which one do you want to try first?
1: Petri Dish Art
Petri Dish Art is made by encapsulating alcohol ink in ArtResin within a reusable silicone mold. The ink pushes through the resin creating vibrant ribbons and colorful "petrified" squiggles.
2: Bottle Cap Coaster
Instead of putting a cap on your beer, why not put your beer on a cap?
Coasters come in many different designs and colors, but one that’s guaranteed to catch everyone’s eye is a resin coaster filled with your favorite beer caps. If you are not a fan of beer, use your favorite soft drink caps.
3: Flow Art Tray
Let it flow!
Spruce up an inexpensive serving tray with some tinted ArtResin! They are functional, beautiful, and a great conversation piece.
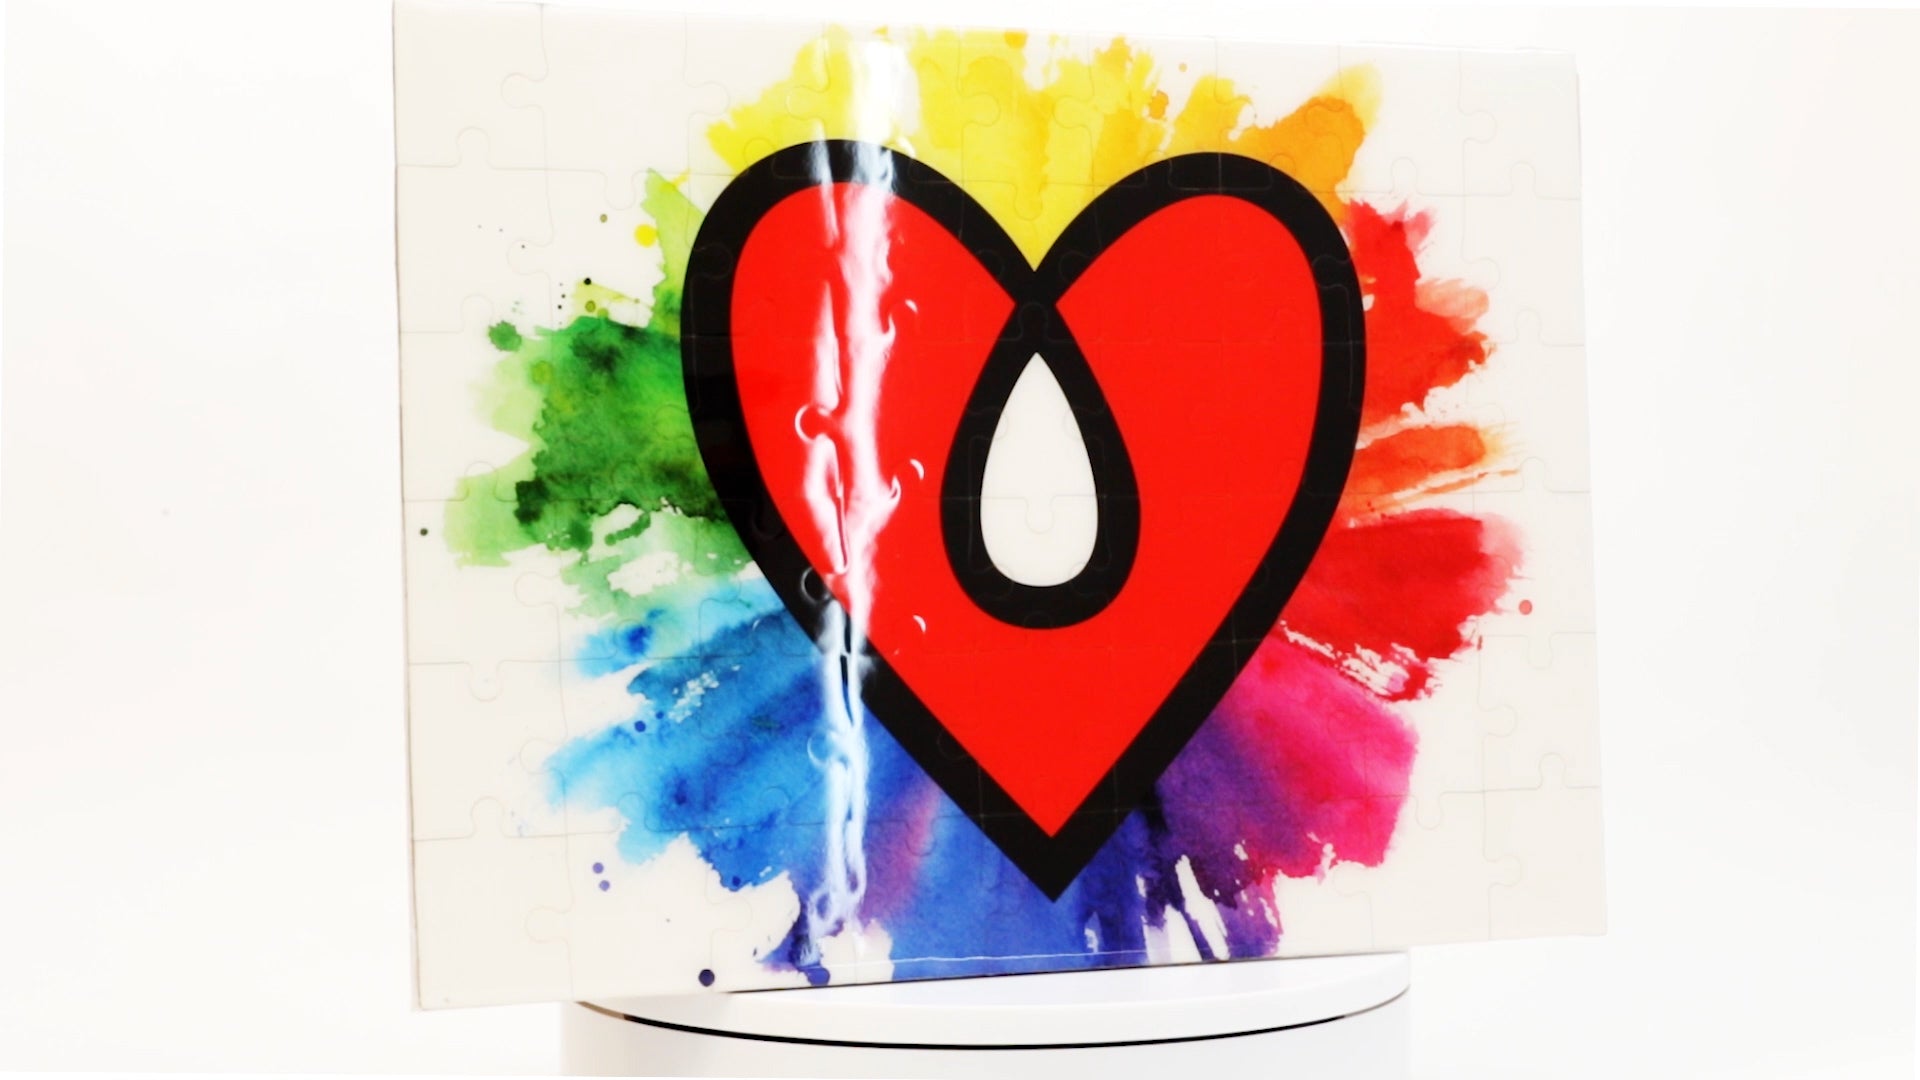
4: Puzzle
Puzzles are fun, beautiful, and do not need to be disassembled! Simply choose a puzzle that you’d love to hang on your wall and coat it in ArtResin so you can enjoy it long after you put in that final, satisfying piece.
5: Add A Resin Accent
Take an existing or a unique piece of artwork and add an ArtResin “accent” to it.
Select a small or big portion of the piece and embellish it with resin to provide some extra oomph. Not only is it shiny and smooth, but it adds depth to an otherwise flat piece.
6: Upgrade Your Art
Upgrade a piece of art by adding a little paint or a shiny coat of resin! It's a great option when you find a piece that's *almost* perfect, but just needs a little something extra.
7: Charcuterie Board
It's easy to see why charcuterie boards are so popular among those who love to entertain!
A charcuterie platter is a show-stopper that's simple to prepare, delivering big on both flavor and looks - especially when you have a gorgeous piece of wood as your starting point. Now, making your own custom, food safe charcuterie board is easier than you think.
8: Crayon Art
Crayon art is so satisfying and fun that you may never stop creating these colorful art pieces. A rainbow of color is at your disposal to melt and design. Adding a little ArtResin pop is also a nice touch to set your work apart from the rest.
9: Jewelry Pendants
Sometimes you just want to make something simple and small to level up your outfit. Jewelry pendants are a perfect way to show the world your creative talent and unique flair.
10: Trinket Dish
Where do you put your change? Or your earrings? Or paper clips?
Creating your own trinket dish is fun, easy and so uniquely stylized that you’ll find yourself placing them all over your home or office. It's functional art!
We hope you found this resin art guide for beginners informative and that it helped to explain and demystify what epoxy resin art is all about.
All you need to apply is to have a debit or credit card, to be over 18 years of age, and to be a resident of Australia.
Late fees and additional eligibility criteria apply. The first payment may be due at the time of purchase. For complete terms visit https://www.afterpay.com.au/en-AU/terms.